WPF TreeView Control - Part 2
Part 1
Part 3
In my previous article I showed how to populate the Windows Presentation (WPF) Tree View control and react to user input. In this article we will look at adding and deleting existing nodes.
Add Node Button
This method will allow the user to add a child or sibling of the currently selected node. This method will first check to make sure a node is selected and then pop up a window to prompt for the type of node to add - sibling or child. A good GUI design would insure that the AddNode method is never called when there is no node to select and we will do that. However, good code is robust!
Let's look at the btnAddNode_Click method:
private void btnAddNode_Click(object sender, RoutedEventArgs e)
{
//Make sure we have a node
if (tvFood.SelectedItem == null)
return;
//Prompt the user - sibling or child?
string nodeText = null;
winGetNodeType dialog = new winGetNodeType();
winGetNodeType.NodeTypeResult result = dialog.GetNodeType(ref nodeText);
//Add node or cancel
if (result == winGetNodeType.NodeTypeResult.AddChild)
AddChildNode((TreeViewItem)tvFood.SelectedItem, nodeText);
else if (result == winGetNodeType.NodeTypeResult.AddSibling)
AddSiblingNode((TreeViewItem)tvFood.SelectedItem, nodeText);
EnableControls();
}
The winGetNodeType window is shown in Figure 1. winGetNodeType has a public function called GetNodeType that returns a NodeTypeResult, which is just a public Enum. The node text is returned by reference. We will add either a child node, sibling node - or if the user has pressed cancel, we just exit.
The EnableControls routine sets the isEnabled flag of the buttons to the appropriate state and is always called after any interaction that might cause a change in the button states:
private void EnableControls()
{
btnAddNode.IsEnabled = tvFood.SelectedItem != null;
btnDeleteNode.IsEnabled = btnAddNode.IsEnabled;
}
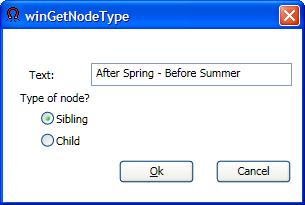
Figure 1 - Dialog to prompt for type of node to add.
Adding a Child Node
It is easy and strait forward to add a child node. We just add an item to the current TreeViewItem:
private void AddChildNode(TreeViewItem selected, string nodeText)
{
//This one is easy - just add another item
TreeViewItem addThis = new TreeViewItem();
addThis.Header = nodeText;
selected.Items.Add(addThis);
}
Adding a Sibling Node
To add a sibling is a bit more complicated. Adding a sibling involves adding an item to the selected node's parent - which might be a TreeViewItem or might be a TreeView. We also need to determine the index of the selected item as we will need this information to insert the new node in the proper place. As with many aspects of WPF, getting the index of an item required quite a bit of googling before I could figure it out. Unfortunately, there is no SelectedItemIndex property or anything even close. To get the selected item, you must first determine the parent, and then call the IndexFromContainer method of the parent's ItemContainerGenerator property. It's almost like Microsoft expected people to read the manual before coding! How silly. Of course, since we may have a TreeView or TreeViewItem, we need to cast the parent appropriately Anyway - here's the method to add a sibling node:
private void AddSiblingNode(TreeViewItem selected, string nodeText)
{
////Here we need to determine whether the item
//is a TreeViewItem or a TreeView
//Let's get the parent
object parent = selected.Parent;
int index = 0;
//It will either be TreeView, TreeViewItem or null
TreeViewItem addThis = new TreeViewItem();
addThis.Header = nodeText;
if (parent.GetType() == typeof(TreeView))
{
index =
((TreeView)parent).ItemContainerGenerator.IndexFromContainer(selected);
((TreeView)parent).Items.Insert(index + 1, addThis);
}
else if (parent.GetType() == typeof(TreeViewItem))
{
index =
((TreeViewItem)parent).ItemContainerGenerator.IndexFromContainer(selected);
((TreeViewItem)parent).Items.Insert(index + 1, addThis);
}
}
Deleting a Node
Since we are adding nodes, we might as well look at how to delete one as well. To delete a node, we first need to determine the parent, and remove this item from the parent's Items collection. Again, as in the AddSiblingNode routine, the parent may be either a TreeViewItem or a TreeView, so we will declare it as an object and cast it appropriately:
private void btnDeleteNode_Click(object sender, RoutedEventArgs e)
{
//Make sure we have a node to delete
TreeViewItem selected = (TreeViewItem)tvFood.SelectedItem;
if (selected == null)
return;
//Get the parent
object parent = selected.Parent;
//Cast the parent as appropriate and remove the selected item
if (parent.GetType() == typeof(TreeView))
((TreeView)parent).Items.Remove(selected);
else
((TreeViewItem)parent).Items.Remove(selected);
EnableControls();
}
The complete source code for this article can be downloaded from the link above. In my next article, I will look at another way to accomplish this using an ObservableCollection instead of brute force.